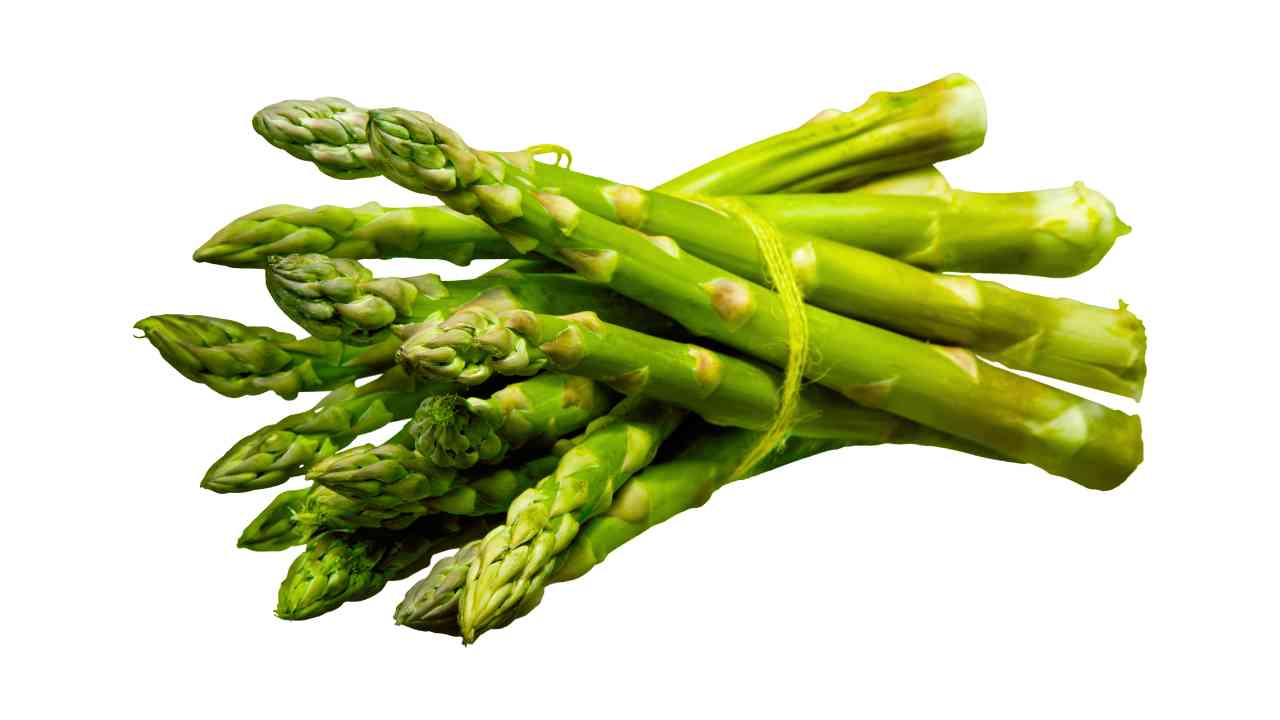
If you know how to do it right, asparagus is one of the best things to grow. It’s also very healthy and tastes best when picked straight from the yard.
The important thing is to learn how to grow asparagus the right way. Kevin Espiritu, an expert, will show you how to get the most out of a crop. Asparagus is an annual vegetable that needs time to grow, but it’s so worth it once you know how to do it! It tastes great and is usually one of the first things that can be picked in the spring.
It’s very healthy because it’s full of vitamin C, B vitamins, iron, and calcium. Even better, asparagus that you pick yourself from the yard will always taste better than asparagus that you buy in a store.
If you don’t mind mild temperatures and lots of rain, you can grow asparagus plants almost anywhere. I’m sure you could even grow them in Florida or the Gulf Coast with some clever problem-solving.
What is Asparagus?
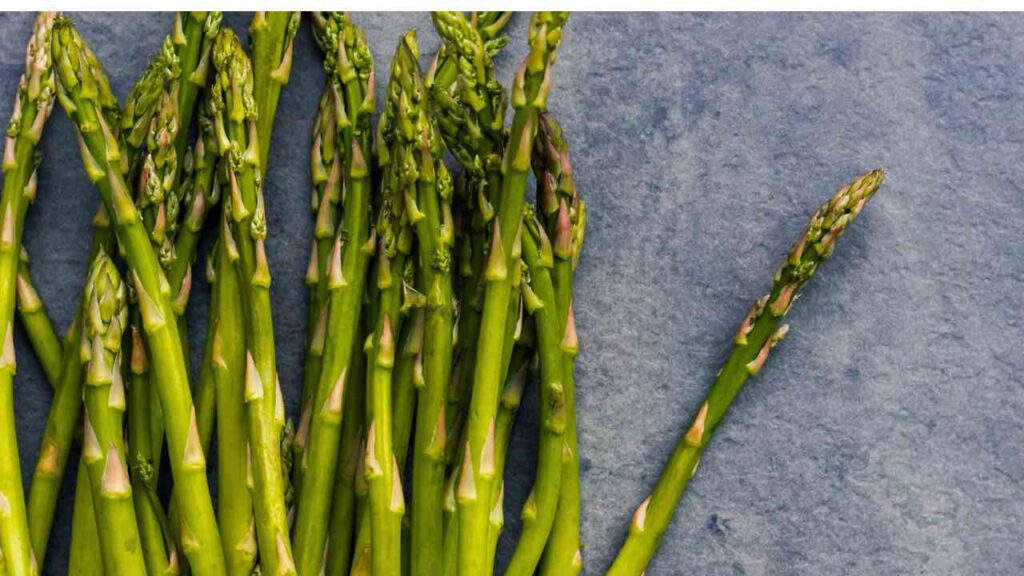
The scientific name for asparagus is Asparagus officinalis, and each plant is either male or female. When it comes to spears, male plants are better than female plants. Since this is the case, many kinds have been bred to be all male. Some heirloom types that are older are a mix of male and female plants.
Native Area
Native to moderate parts of Europe, northern Africa, the Middle East, and western Asia, asparagus officinalis grows right where it is. It does best near the water, on riverbanks, and in soft soils, usually in places that get a lot of sun and have soil that drains well. As a result of its deep roots, the plant can grow in a wide range of soil types and dry places, especially near the Mediterranean and Atlantic coasts.
Because it is hardy, asparagus has spread to other cold areas, where it is now grown mainly for its young shoots, which are delicious in food.
Features and Traits
If you only want to get male plants, look at your asparagus plants through a magnifying glass when they flower. The pistils of female plants have three lobes, and the male plants are longer and bigger than the females. Take out all the female plants and move the men to the permanent bed in the spring.
If you don’t care as much about yield, you might want to try some of the less common heirloom types of asparagus. If you want to collect seeds, you’ll need female plants from these heirlooms. Both male and female plants are very pretty.
Varieties

As with many other veggies, a lot of hybrids have been made to try and make the species better so that crops are bigger and plants are less likely to get diseases. Here are a few of the kinds you can pick from:
- Jersey Giant has a high output, doesn’t get diseases, and tastes great. Plants that are mostly male.
- The plants in “Jersey Knight” are mostly male. Very immune to most diseases that affect asparagus. Hardy in places that freeze.
- “Jersey Supreme” is a twist on “Jersey Knight” that was made earlier. Plants that are male. able to handle cold and fight disease.
- “Mary Washington” doesn’t rust and grows long, thick, soft shoots. An heirloom type.
- “UC 157” is a heavy-producer industrial variety that is highly resistant to Fusarium and rust.
- “UC 72” is a type of “Mary Washington” that is resistant to fusarium and rust and can handle heat and drought.
- “Pacific Purple” spears are bright purple and have a mild taste. Beautiful range.
- “Purple Passion” spears are sweeter and more tender than some green types. They taste excellent raw.
- “AsparaBest” plants are mostly male, can handle cold well, and produce a lot.
- “Precoce D’Argenteuil” is an heirloom type with buds that are rose-colored. Plants that are both male and female.
Setting Up
Because asparagus grows back every year, you need to plan ahead before you plant it. You’ll be picking this crop for years to come, after all. Plant asparagus in early spring. Plant as soon as you can work the soil.
Crowns
A more common way to start is with asparagus crowns, which can be put right away anyway.
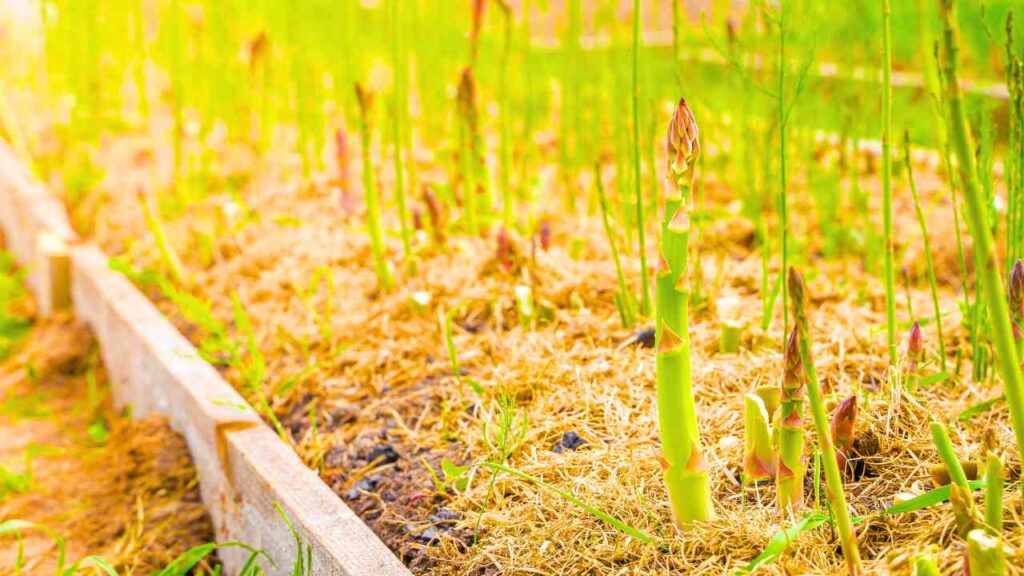
It’s essential to be very careful about where you put your asparagus. Because you’ll be picking asparagus for more than 20 years, make sure the spot you pick is ideal. A lot of people choose to grow asparagus in raised beds because they let the plants drain well and make it simple to gather.
Being able to choose a spot where your asparagus will get the most sun is very important, especially since it will come back every year!
Make sure that the area where you want to plant is completely free of weeds. Other weeds don’t like it when asparagus grows next to them. Put down a lot of mulch over the area to help stop weeds from growing.
Make a hole that’s about a foot wide and deep. In the top of your bed, add two to four inches of compost, dung, or high-quality soil mix to make it look better.
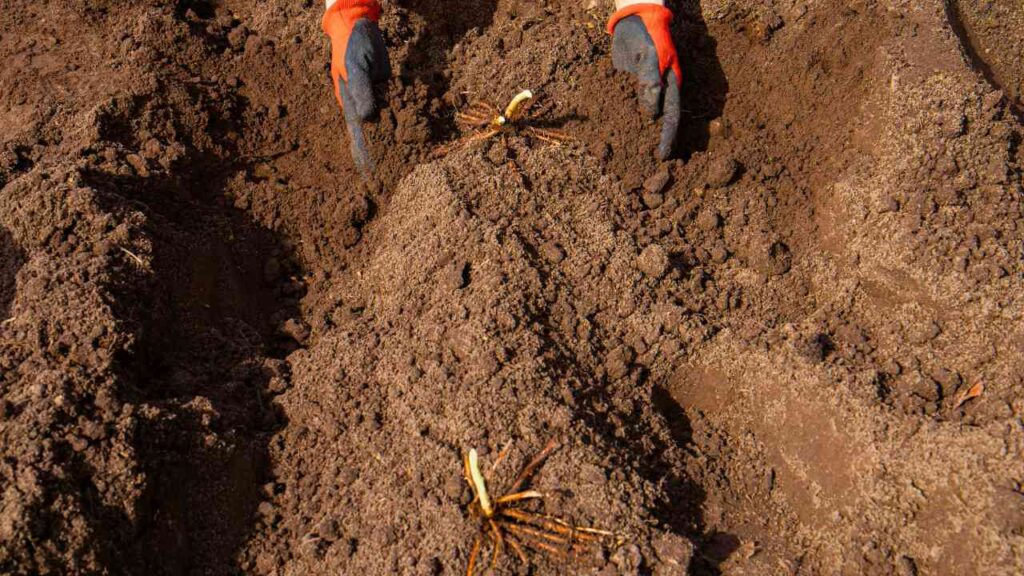
Some people say that you should soak your asparagus tips in compost tea for half an hour before planting them. You can use water instead of waste tea if you don’t have any on hand. The goal is to fully wet the root mass and make it a little easier to shape and spread.
At 18-inch intervals, make mounds that are four to six inches high. Carefully place your asparagus stems on top of the mounds, making sure that the roots spread out across the top. Make sure the buds, which look like little asparagus stems, are facing upward. Add two to three inches of soil over the roots and tops of the asparagus and water them in.
More dirt should be added as shoots appear until the trench is full. You can also pile things up above the ground if you want to. This makes sure that the roots are deep enough to keep the plant safe from hot or cold weather.
Plant Seed
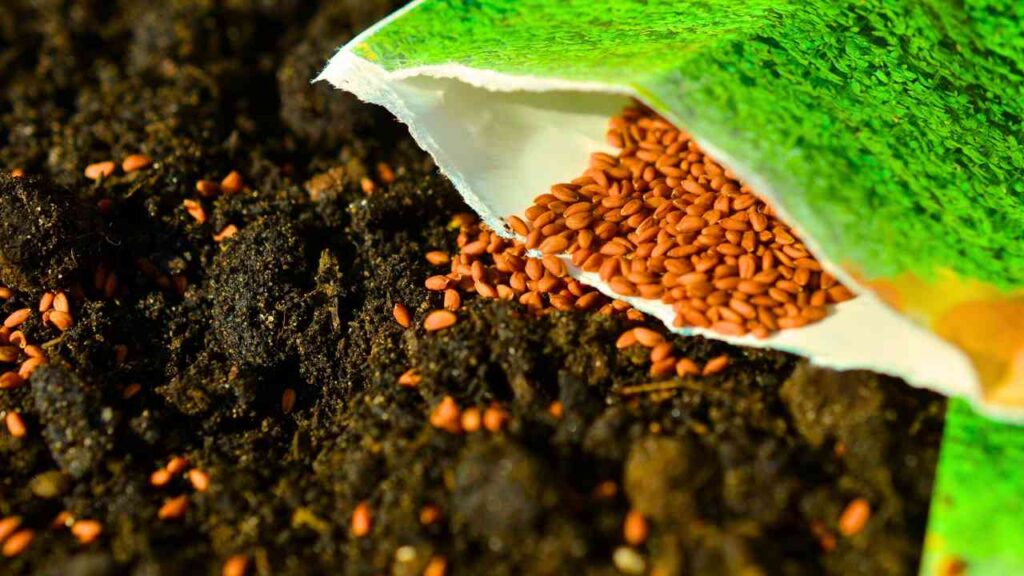
For growing from seeds, make sure you start them early enough so they have time to grow into three-inch plants before the last frost. That way, you can move them right out as soon as the ground is dry enough to work on.
For asparagus plants grown from seeds, the steps are the same, but you don’t need to dig as deep of a hole. It will have a lot fewer roots and will spread out further into the ground on its own. A nursery patch is often made for first-year plants to grow in before they are moved to their permanent beds later. In any case, you should change your dirt so that your young plants can get the nutrients they need.
How to Get Bigger
In some places, asparagus grows on its own. It usually does this in places that are cooler and get a lot of rain. What about those of us who don’t live near a natural bounty? Here are some tips to help your asparagus grow well.
Light
Sod should be in full sun for at least six to eight hours a day. It can grow in some shade, but it might take a little longer to get bigger. If you plant asparagus, you should always keep it around for a long time. To do this, put it somewhere that won’t get shaded by new buildings, or use raised planters that you can move around quickly if you need to.
Water
Once established, most asparagus is fairly resistant to drought. But for the best yield, water is a must. Asparagus grows best when it’s damp but not wet. It’s time for a thorough soak if you stick your finger into the ground and can’t feel any water in the top couple of inches.
An inch of water a week is usually enough. When there is a drought, it is best to give the plants a deep soak every 10 to 14 days. With raised beds, a drip irrigation device is the best way to water your plants. This way, you can keep the dirt moist without watering the plants’ leaves. To keep the plant from getting fungus-based diseases, don’t water the fronds or spears.
Heavy covering is a good idea whether you’re growing in the ground or in raised beds. This keeps the earth moist and makes it less likely that weeds will grow.
Soil
Soil that drains well and is full of nutrients is a must for your asparagus. It takes a lot of food for this plant, especially calcium. Before you plant, I suggest working compost, cow or horse manure that has been composted, or both into your bed carefully. You can also add rock phosphate to your soil to make it more phosphorous-rich. Soil with a pH of 6.5 to 7.0 is suitable for asparagus.
Heat or cold
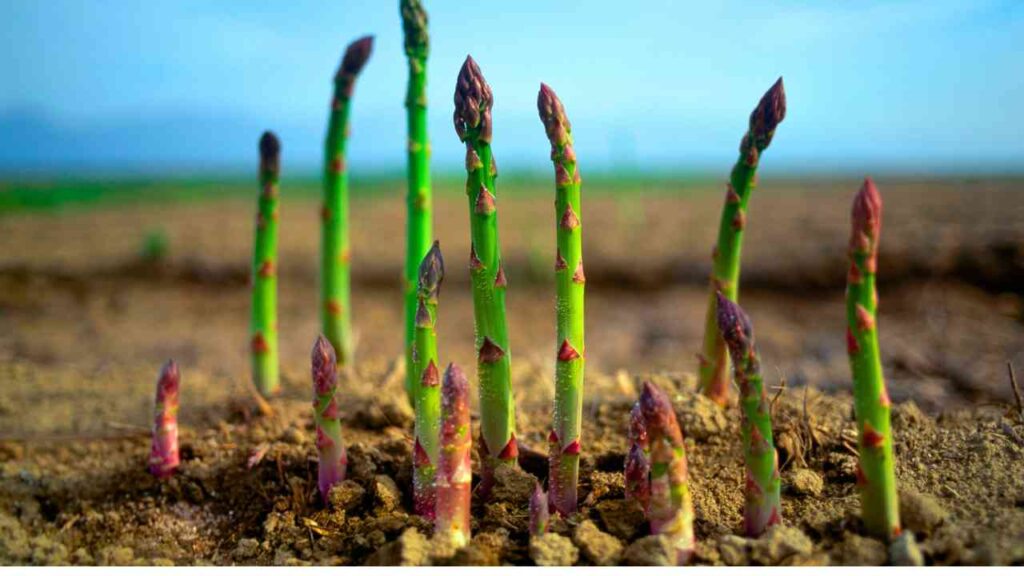
When the ground gets above 50°F (10°C), asparagus will grow new stems. To make things, though, the best temperature range is between 60°F and 70°F (16°C and 24°C) at night and between 75°F and 85°F (24°C and 29°C) during the day. Between those two points, it’s normal for a plant that’s already grown to grow three to six inches of asparagus blades every day!
If it’s above 85°F (29°C) or below 55°F (13°C), roots will grow more slowly and shoots will produce less. Hotter temperatures also make plants lose their shape, and fronds form too early. When it gets close to or below freezing, plants turn different colors or die back.
Feeding Plants
Late summer or early fall is the best time to fertilize, and maybe even again in the spring. Because this plant needs it, use fertilizer that has more calcium and potassium in it.
Use powdered fertilizer that breaks down slowly in the fall. To add fertilizer, move the mulch back and work it into the top layer of soil. Be careful not to put the fertilizer right up against the plant or its roots. You can top it off with a scoop or two of compost if you want to. After that, put new mulch around the plant.
The process is the same in the spring. Be careful, though, because you don’t want your fertilizer to hit any new spears that are growing from the ground. For most plants, fertilizing in the spring isn’t necessary, but it can help older plants grow even more.
Taking Care Of
When you grow asparagus, you prune it in two stages: first, when it’s time to pick, and then in the fall, before winter. Let’s talk about trimming in the fall. Your asparagus plant will turn yellow and then brown as summer ends. This is fine. So that it can survive the cold, the plant is putting its energy into its roots.
Cut off the plant’s dead growth at the soil’s top once the whole thing is brown. Throw away or compost the leftovers. This lets new plants grow in the spring. To stop weeds from spreading, mulch your patch heavily, and check it often during the winter to make sure no weeds have grown. It will grow again in the spring!
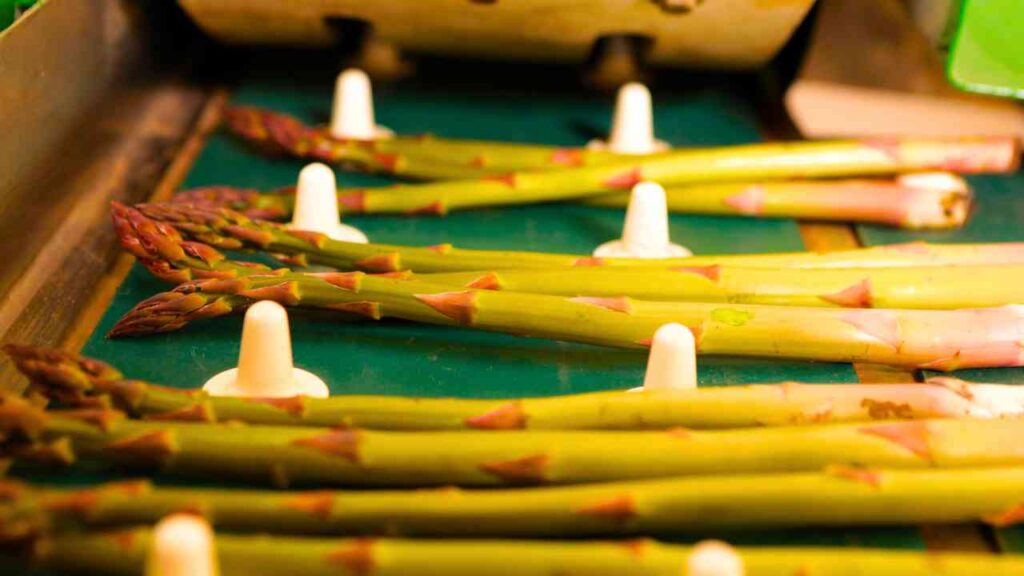
Cleaning Up
If you’ve ever grown asparagus and seen spears that are completely white, that’s because the soil covered them. Pile dirt on top of your plants to make sure spears grow even when there is no light. As often as twice a day, if not more often, make sure you check on your plants every day. Keep piling up dirt to cover your spear until it’s at a suitable height for gathering. After that, you can pick an asparagus spear that is all white!
Putting hoops over your asparagus rows and covering them with black plastic to keep the light out is another way to bleach the color. Every two days, lift the plastic to get to the white asparagus from below. White asparagus is almost the same as green or purple asparagus, but some people think it tastes less strong because it doesn’t get as much sun.
Spreading
You can grow asparagus from seeds or by dividing the roots. Here are some tips that will help you with both tasks.
Seeds
When you plant seeds, keep in mind that it will take a few years for the plant to grow asparagus spears that you can eat. It grows its root mass in the first year. In the second year, it spreads its roots out and works them deeper into the ground, but it won’t produce as many spears.
You should start your seeds early enough that when the last frost comes, you will have young plants ready to put out. Early-stage growth does best in soil that is warmer than 50°F. People who start plants from seeds will often put their first-year plants in a “nursery bed” so that their roots can spread out. In the autumn, they will be moved to a new location.
You need to soak your seeds in water for 24 hours before you plant them. Then, put them the way the seed packet tells you to. You can use a seed ball or any other container you like to start your asparagus. Just make sure there is enough space for the roots to grow.
Divided Up
If your older plants are getting too crowded, it’s time to split up their root mass. In general, you’ll know it’s time to split your plants when they stop producing as much after a few years of farming.
Carefully dig up the whole root mass in the fall after the plant has died back to split the roots. After that, you can cut the root ball into several pieces, making sure that each piece still has a lot of root in it. You can either plant those root pieces again right away or put them in a plastic or paper bag with sawdust to keep them safe over the winter. Then, plant the root pieces as new asparagus tops in the spring.
When you move your asparagus plants, you need to be careful. The head of the root may be close to the ground, but the rest of the roots go deep into the ground. Move the dirt away from the plant slowly so that you can pull it out of the ground whole.
To plant it in a new bed, follow the steps above for planting asparagus crowns. The roots should be spread out over a mound of soil and buried a couple of inches deep in new soil. As if it were a new plant, take care of it.
Alongsiders
To sum up, asparagus doesn’t like having to compete with weeds or grass for room. You shouldn’t put anything else on top of your asparagus plants because it will take away their nutrients. But there are some plants that do do better when they are near asparagus!
There is a satisfactory balance between tomatoes and asparagus. Solanine is a chemical that tomato plants give off that keeps asparagus bugs away. In exchange, asparagus gives off a natural chemical that worms can’t live with. They grow very close to each other. Allow enough room for the roots of both plants to spread out without touching.
Basil and parsley are also excellent for asparagus because they keep asparagus bugs away. They also help tomatoes grow, so a bed with all of these plants can be very productive!
You can put spinach, lettuce, or even beets between the rows of asparagus for an early, short-term spring crop. To get more lettuce or spinach in late summer, plant asparagus stems around them. The leaves will protect you from the hot sun. Alliums, like garlic or onions, should not be planted near your asparagus. Tuberous crops, like potatoes, should also not be planted nearby. These don’t do well with asparagus.
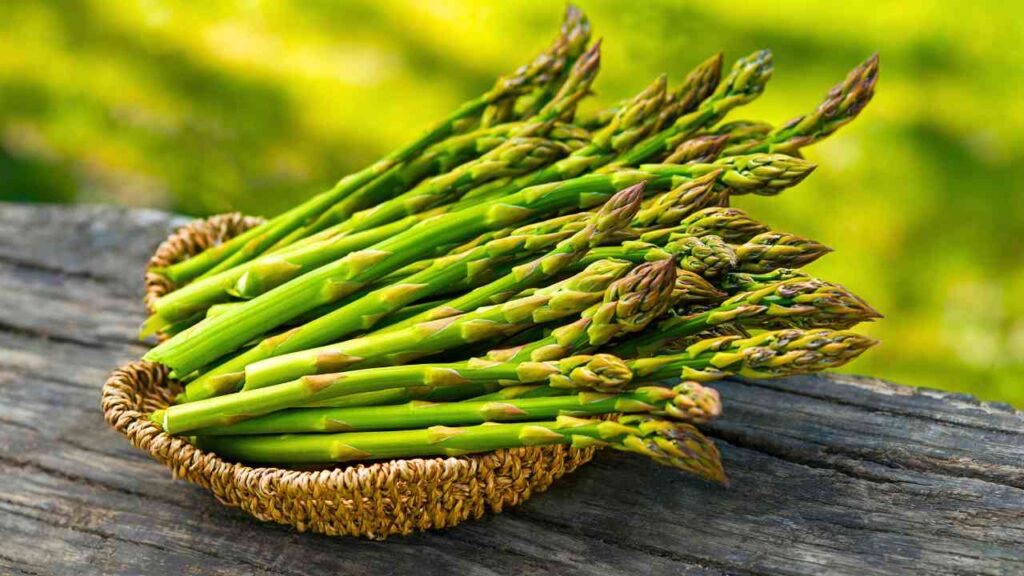
Getting Food
If you grew asparagus from seeds, you shouldn’t pick any the first year because the plants are just growing roots. In the same way, the second year is for plant growth, so you shouldn’t pick spears that year either. In the third year, you can pick some for two to four weeks. When the new spears are less than a pencil’s width, you should stop. In the years to come, gather for up to eight weeks.
In fact, you probably shouldn’t gather asparagus from crowns that have been moved until the second year. The crop would last no more than two to four weeks that second year. In the following years, you will be able to gather more because you gave the plant the best start possible.
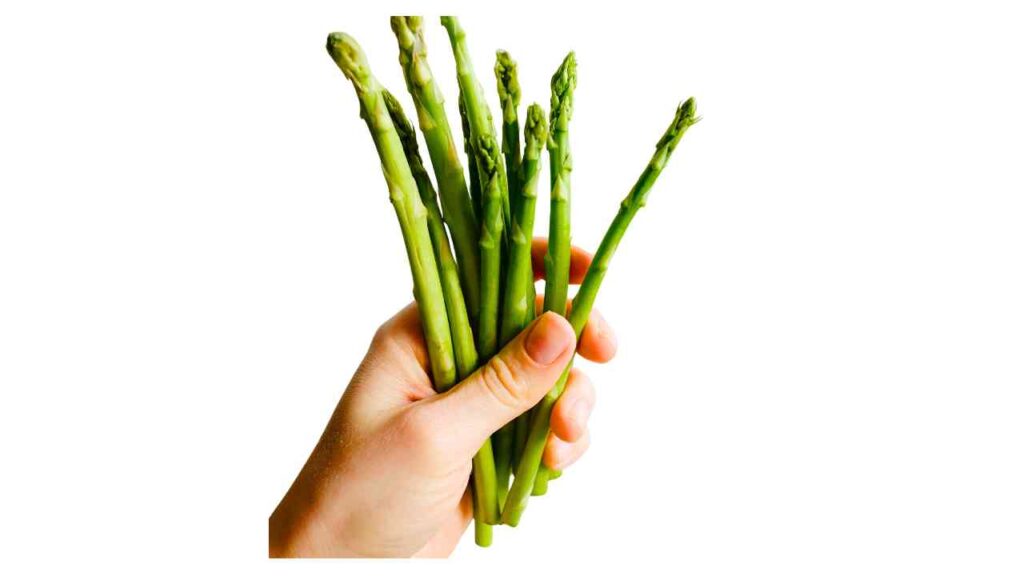
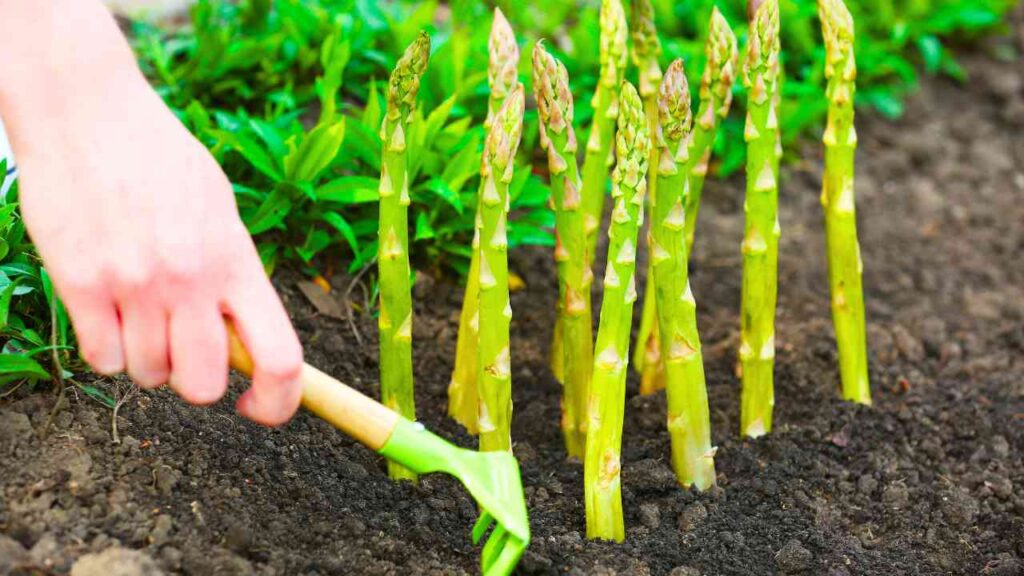
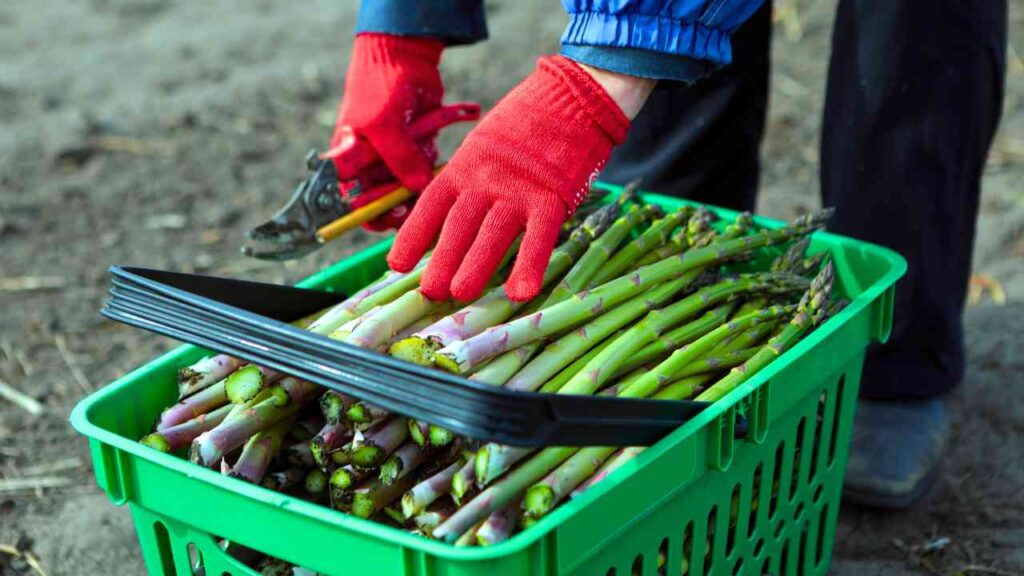
Cut the tip off with a knife to get the asparagus. For some plants, this is best done just below the soil’s surface. If you do that, don’t cut any other spears that might be growing below the ground. I like to cut just above the ground. You can also grab the spear and bend it so that it breaks off just above the ground.
When you gather your spears, they should be between six and nine inches long. If the spear tip has begun to open up, it means the asparagus has turned tough and is no longer safe to eat. During your harvest time, you should still pick those spears, but you should compost them.
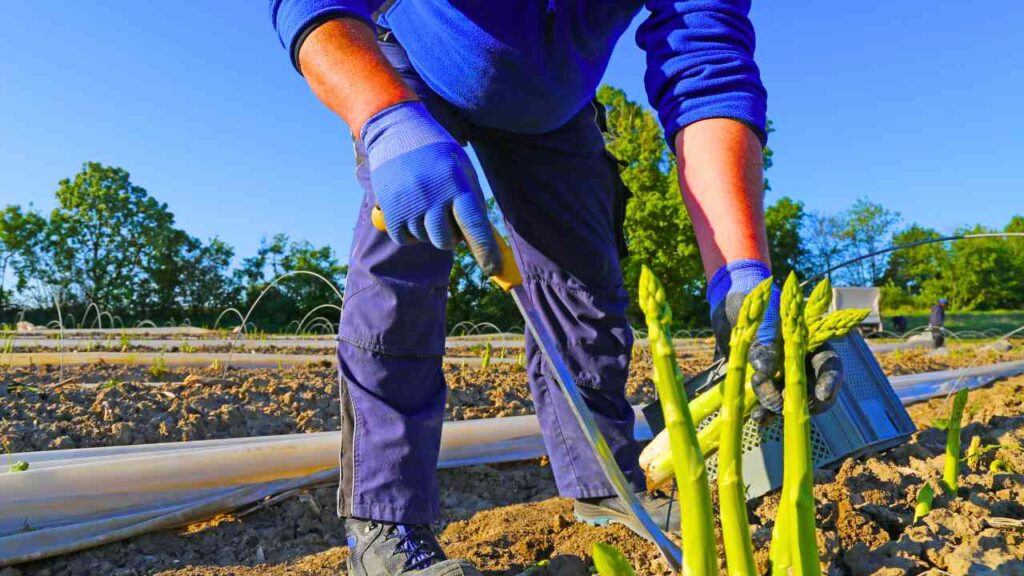
Pick asparagus spears every day or two during the growing season because the plant grows so quickly. Every time you gather, pick all the spears that are a suitable size. This way, you’ll have a steady crop for up to eight weeks!
Storage

If you have a lot of asparagus plants, you might need to store some of them for later use. Fresh asparagus right from the yard is delicious. We’ll talk about how to do this in the fridge, the freezer, and the shelves of your closet.
Put your fresh asparagus in a bunch and rubberband it together if you need to store it for a short time. Put the ends that have been cut or snapped off into a canning jar with about an inch of water. Cover it with a plastic bag and tie it to the mason jar with another rubber band. If the water starts to get cloudy, you should change it. Your asparagus will last about a week if you store it this way.
Freezing
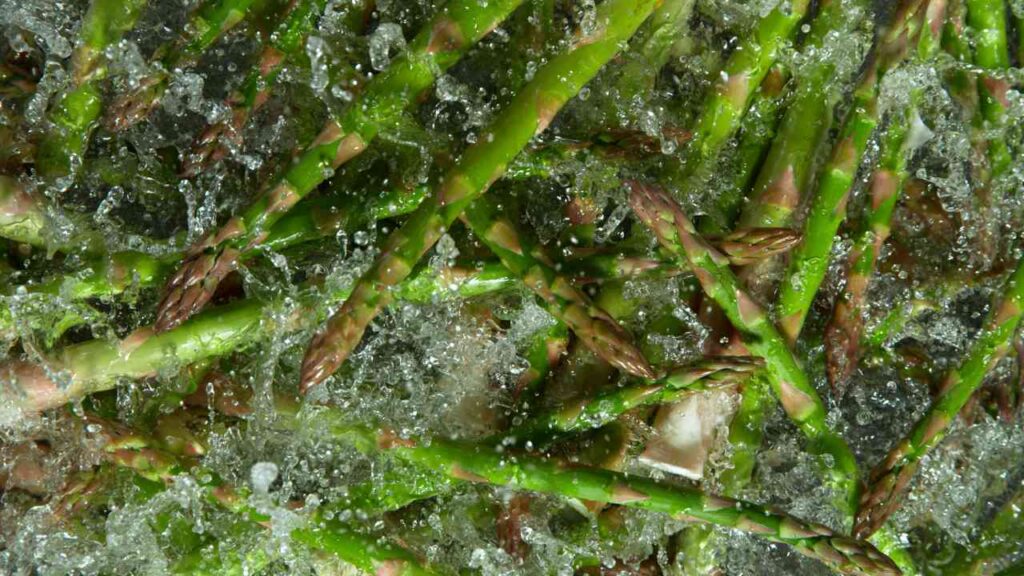
If you want to keep your asparagus for a longer time, lightly boil it and then freeze it. Start an ice bath and bring a big pot of water to a boil. Cut your asparagus into pieces that are about an inch long. Put the asparagus in the pot for one minute when the water starts to boil very quickly.
Some stalks may take less than a minute, while others may take up to a minute and a half. Cut the asparagus into pieces and put them in the ice bath when the time is up. Put it in cold water for at least the same amount of time you boiled it. Then, use a sieve to drain it and let it dry on its own.
Spread the asparagus out on a sheet pan and cover it with plastic wrap after it has dried. Put it in the freezer for about an hour. The asparagus won’t stick together later because of this first flash freeze. After that, put it in a jar or freezer bag to keep it for a long time. Asparagus that has been frozen will last for about a year.
Canning
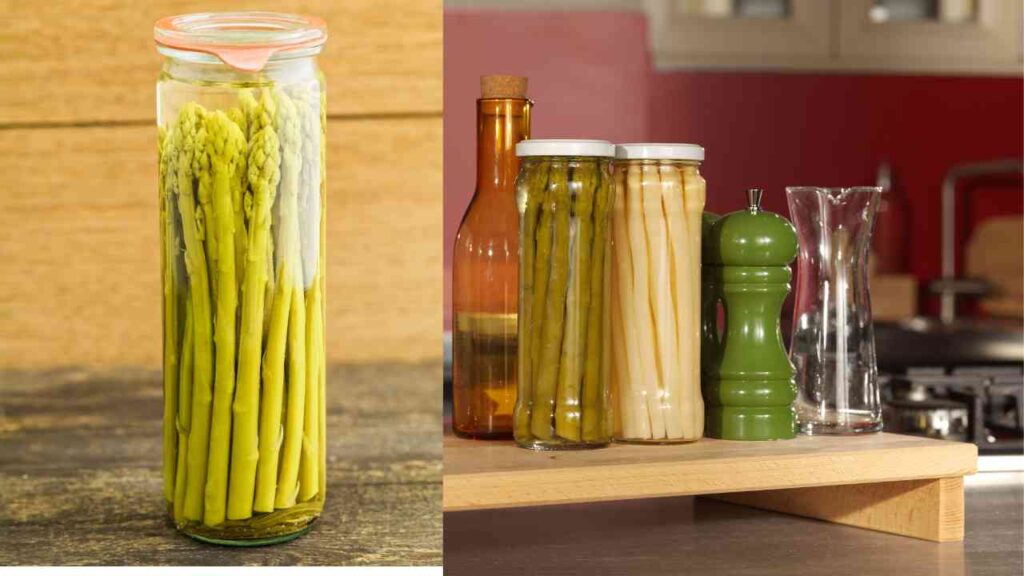
You can also put asparagus in a can and use it later. But because it has low acid, you will need to use a pressure canner to keep it from going bad or getting dangerous bugs like botulism.
When you can asparagus, you can use whole spears in recipes. Put a quart-sized jar on its side and make sure it is clean and germ-free. Then, slide spears into the jar so that the wide end is at the bottom. Put a lot of asparagus tips in the jar and then stand it up straight. Add a teaspoon of salt to each quart jar if you want to. You don’t have to, but it will make the taste better.
First, boil the water, and then pour it into the jars. Water should cover all of the spears, but there should be an inch of room between the top of the water and the jar’s edge. Put the jar caps and rings on top of the jars. Pressure-can them at 10 pounds of pressure for 40 minutes (or 11 pounds for a dial-gauge canner). According to the canner’s maker, you should change the pressure if you live at a high elevation.
To Pickle
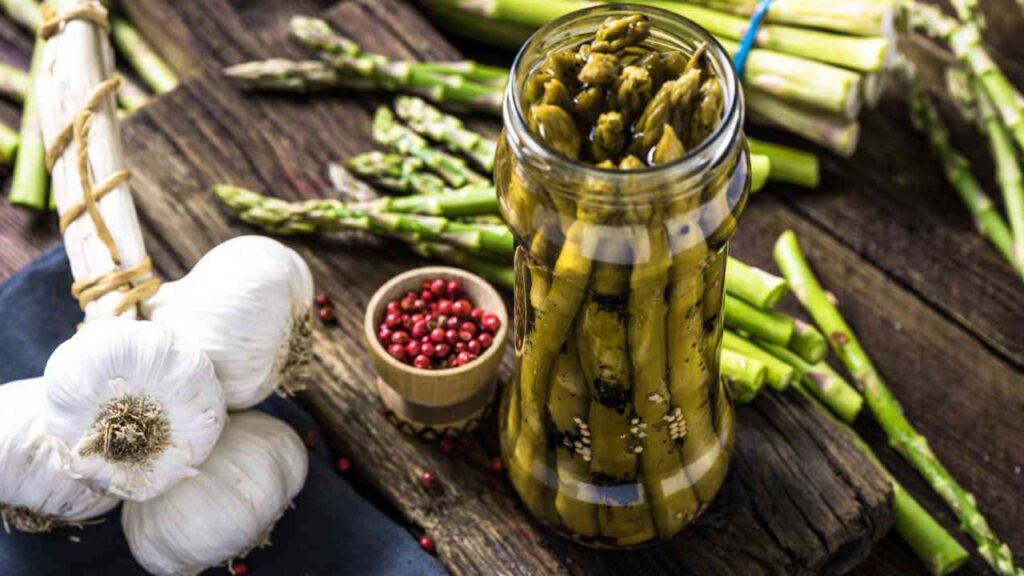
There are also lists of ways to pickle asparagus. You can use a hot water bath canner instead of a pressure canner to make pickled asparagus because you are making it much more acidic. But make sure your recipe is for a pickle that you can put in the fridge, not one that you can!
Dehydration
Also, you can dry out your asparagus! Follow the steps above to blanch your asparagus in hot water. Then, cool it down with ice water to stop the cooking process. Spread the asparagus out on dehydrating trays after it has been drained. Put pieces with a greater thickness next to each other on one tray, pieces with a medium thickness next to each other on another, and the tiniest pieces on the third.
Use the instructions that came with your dehydrator to dry the asparagus until it is completely dry and simple to break. Keep in a container that won’t let air in, and add a desiccant packet to get rid of any remaining moisture. You can either soak it in water for 15 to 20 minutes before cooking to make it work again, add whole dried chunks to soups or stews, or grind it up to add flavor to other foods. You can also eat dried asparagus as a snack.
By the way, freeze-drying works wonderfully for broccoli too. This way of preserving seems to work best with spears that aren’t too thick or too thin. Make sure you boil it first!
Most Common Issues
Once you know how to take care of asparagus, it’s not hard to grow, but there are a few things that can go wrong. Now let’s go over those.
Getting worse issues
If you notice that your new shoots are going brown or have become soft and dried out, it’s possible that frost hurt them. Cut those stalks off and put them in the compost. If frost is going to happen, cover your plants with a thick layer of straw or newspaper.
Asparagus stems that were grown in a nursery can get transplant shock. Try not to buy your crowns until you’re ready to plant them to avoid this. Before you plant them, soak them for a short time in water or compost tea for about 30 minutes. Be light on the root mass. As you spread the roots out over the raised dirt, be careful not to break any of them.
If you live somewhere where the wind will blow sand around, try putting a wind block over your asparagus spears. Sand blown by the wind can hurt the young shoots and make them bend. Plants that have been damaged may also be more likely to get diseases.
In the same way, shoots may bend in grounds with more rocks, but this doesn’t change how nutritious they are for eating. For straight spear growth, you need to make sure your plants have adequate dirt that drains well.
Purple asparagus may not produce as much as green asparagus. To really solve the problem, you need to either grow more purple asparagus plants or more green ones, especially some of the higher-yielding types.
Bugs

Pests are the only ones that really hurt asparagus, but they can do a lot of damage.
Cutworms can hurt young spears. Cutworms usually damage the spear’s young tip, which they will eat off. However, one type of cutworm, known as the dark-sided cutworm, has the ability to consume a hole in the sides of the spears, causing them to twist in a manner akin to a corkscrew.
Cutworm pupae can be killed by making sure that your earth has a healthy population of beneficial nematodes. Use Bacillus thuringiensis (BT spray) on the leaves of your plants to kill any that have come out to eat them. Use row covers that float to keep the moths away.
It is by far the worst thing that can happen to asparagus. Pest: This animal can chew its way through plant leaves and make holes in spears. Besides cucurbits, it can also be dangerous for other plants. With these, helpful nematodes can also be used to kill pupae.
Another pest that could hurt your crop is the asparagus miner. The young of this little black fly will eat the cracks in the sides of shoots. Fusarium germs have been found on this animal, so it could spread disease. It happens a lot in business plantings, but you can stop it from happening by putting floating row covers over your plants. Cut off and get rid of any leaves that look like they are damaged. To stop breakouts, remove plant stalks before the winter.
Lastly, aphids and thrips are two very common pests that can kill your plants. Putting neem oil on your plants will get rid of both of these problems. Make sure to get the spears as well as any leaves on the top and bottom of the stalks.
Diseases
A lot of different diseases can really mess up your asparagus patch.
Rust on asparagus is one of the most common types. This disease spreads quickly and makes leaves and other plant parts turn orange. The spots turn a rusty orange-red color, and if you don’t catch them, they turn black. This is an illness caused by fungus. It can be treated while it’s still red to orange, but the black color means that the spores have fully formed and are ready to overwinter.
As you might have guessed, Stemphylium purple spot causes purple spots. This might not be dangerous if it’s just on the stick, but it can quickly become a big problem if it gets on the plant leaves.
If your asparagus trees get fusarium root rot, it’s terrible. It’s too serious that Fusarium is an infection that grows in the dirt and gets worse over time. Since there is currently no treatment, the best way to protect yourself is to plant resistant types. When plants show signs of fusarium root rot, they should be taken out and thrown away. Do not plant more asparagus in beds that are already sick! This weed can stay in the ground for three years or longer.