
Here’s an inexpensive and very effective way to make liquid fertilizer at home that doesn’t involve straining smelly liquids through cloth or mesh. This method is not only easy but also very clean. You won’t have to deal with the mess or strong smells that normally come with liquid fertilizers or compost teas. This method is excellent because it is quick and easy. The fertilizer automatically strains itself, which saves you time and effort while still giving you a forceful and nutrient-rich liquid. With this method, you get fertilizer that is full of bacteria, minerals, and nutrients that your plants will love.
This liquid fertilizer is excellent for your yard because it contains microbes that improve the health of the soil, help plants take in more nutrients, and make them grow faster overall. Of course, you don’t need any fancy tools or special skills to make it. All you need are a few simple items and some time. Now let’s go through this step-by-step process together. Soon you’ll be able to make your own homemade liquid fertilizer that strains itself! This method will ensure your plants get the nutrients they need to grow with minimal effort and mess.
Setup Bucket System
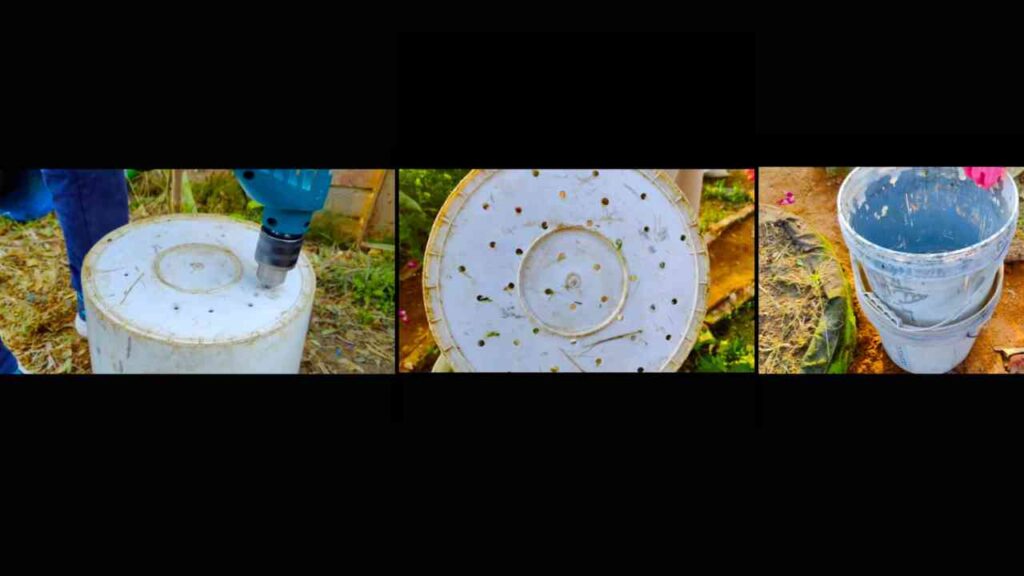
You will need two buckets to begin with. We’ll use two old 5-gallon buckets for this example because they are just right for the job. Use a drill to make several holes in the bottom of one of the boxes. This stage is the first step. Make sure there are many holes because that’s how the liquid fertilizer will drain during the process. Put the bucket with holes inside the second bucket, which doesn’t have any holes in it. The bottom of the inner bucket should be about 2 to 3 inches (ca. 8 cm) above the bottom of the larger bucket. This configuration must be set up to allow the liquid fertilizer to drip from the top bucket into the bottom bucket.
Adding Kitchen Waste to Fermentation

When you’re ready to start the fermentation process, get your food waste together and get it ready. Adding kitchen trash to your homemade fertilizer is a fantastic idea because it has nutrients and organic matter that will help the soil break down and grow. Some types of cooking waste that you can use are fruit and vegetable peels, like banana peels, potato skins, and even the skins of peas and onions. These food scraps are full of important nutrients that will help your garden grow after they break down.
You can also add used salad leaves, flower stems, coffee grounds, or other plant-based scraps. When digested, these nutrients will create a solution rich in microbes. These things are broken down into simpler forms that your plants can easily take in during fermentation. For this process, it’s best to focus on uncooked plant-based waste. Cooked food, oils, and other things that don’t break down should be ignored. Cooked food and oils can add germs or pests that you don’t want, and things that don’t break down naturally won’t go away.
After getting all the right food scraps together, it’s time to put them in the container. It is important to use a jar with holes in the bottom. These holes will let any extra water drain out and help the fermentation process get enough air. Spread out the kitchen waste evenly in the bucket, making sure it’s packed tight but not too tight so air can move. The heat will help the things break down quickly and turn into a powerful, nutrient-rich liquid fertilizer that your garden can use. Make a healthy, eco-friendly fertilizer for your plants with these simple steps. It will be made from things you would normally throw away!
Pressing the trash to break it down faster
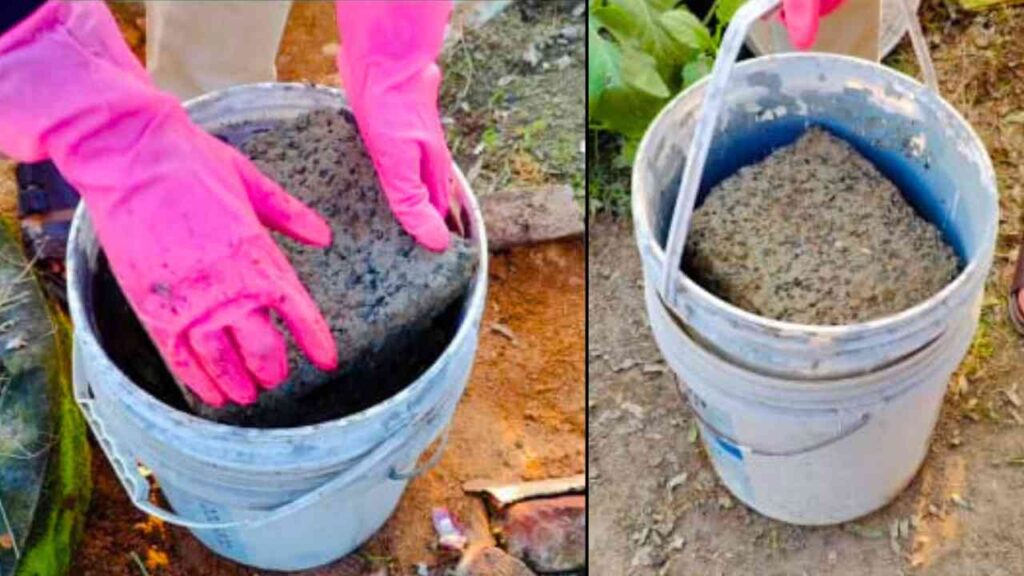
Now, to speed things up, put a big brick or something else heavy on top of the trash in the inner bucket. The materials’ weight presses down on the trash in this step. The pressure accelerates the breakdown process and helps squeeze out the liquid that is full of nutrients. Put a lid on top of the bucket once the weight is in place. It’s important for the bacteria to be able to do their job, so leave the lid a little loose.
Gathering Liquid Fertilizer
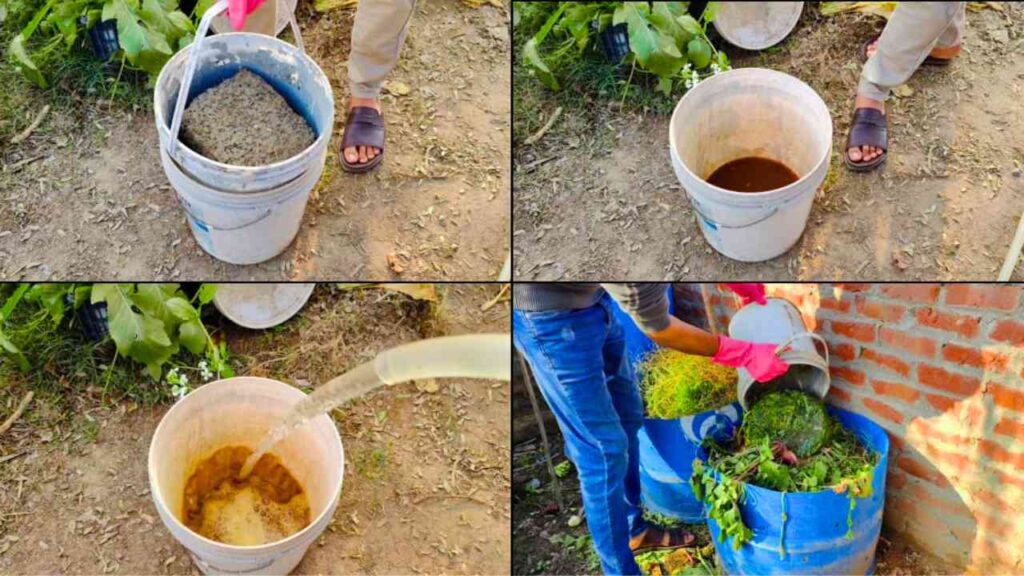
After putting the pot together and adding the kitchen trash, it’s time to start the fermentation process. Don’t touch the setup for about 15 days. The organic waste in the top bucket will start to break down organically during this time, thanks to the action of beneficial microbes and the moisture in the waste. The organic matter will break down and release liquid into the bucket below, which is what you want to happen. The liquid in the top container will slowly drip through the holes in the bottom of the top container and gather in the bottom box.
The liquid will slowly build up over the next two weeks as the biological waste continues to ferment and break down. The liquid that drips down is full of minerals, nutrients, and good bacteria that are great for fertilizing your plants. This process works very well because the bacteria in the waste will break it down into its simplest, most bioavailable form. The end result is a strong, nutrient-rich liquid manure that is ready to feed your plants.
As the breakdown process goes on, you may notice that the liquid gets darker over time. This indicates that the beverage is becoming increasingly nutrient-rich, making it suitable for consumption. You’ll have a strong fertilizer full of microbes after 15 days. It will give your plants a natural and effective nutrient boost. The best part is that you didn’t have to go through a complicated straining process. The container’s design separates the liquid from the solid waste, so you don’t have to do anything else to use it.
Fertilizer Diluting and Using
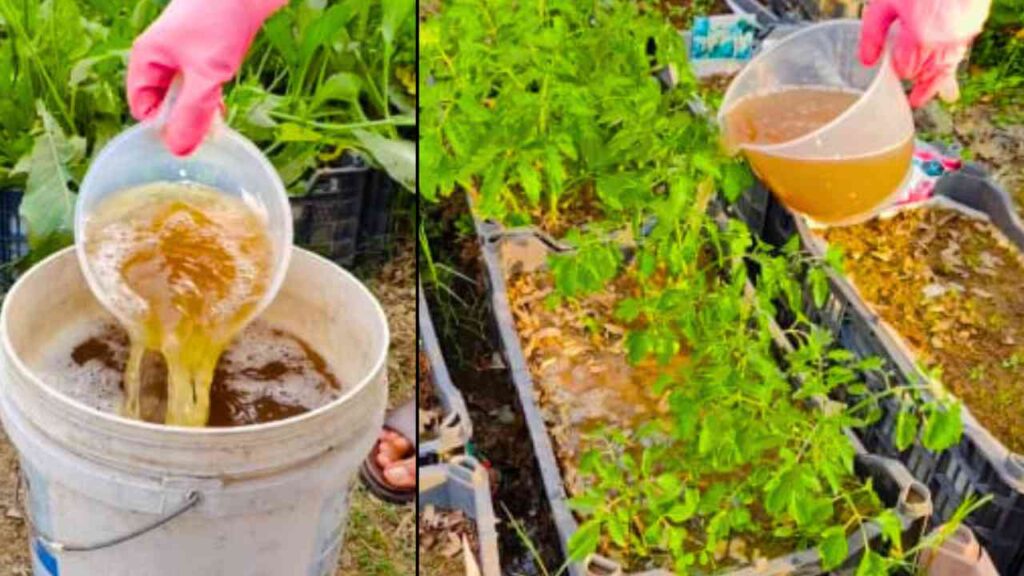
It’s time to collect your liquid fertilizer after seven days. Remove the inner bucket from the outer bucket and drain any remaining liquid. Make sure you keep every drop of this valuable drink, because it’s forceful. You can add the trash from the top bucket to your compost pile or use it as organic matter in your flower beds to make the soil even better.
It’s important to water down the liquid fertilizer before using it. This fertilizer is forceful, and using it on plants without diluting it could hurt them. One liter of liquid fertilizer mixed with ten liters of water is a good amount. After giving it a good stir, you have a great nutrient solution for your plants. When you water your plants with this solution, you’ll see how fast they respond with better growth, greener leaves, and bigger blooms.
Good Things About This Method

The liquid fertilizer you make is full of important nutrients and microbes that are beneficial for the soil and help plants grow healthy. The process saves money and reduces waste by eliminating the need for costly pesticides. It’s also eco-friendly and made from only natural ingredients.
If you liked this easy and useful tip, please like the article, share it with your friends, and subscribe to our site for more great gardening tips and do-it-yourself fertilizers and sprays. Please tell us in the comments how this worked for you.